
RADIO SYSTEMS CORPORATION
PetSafe Happy Ridge Tubular Barrier
SKU: PT0160600165Black, 1ea
Couldn't load pickup availability
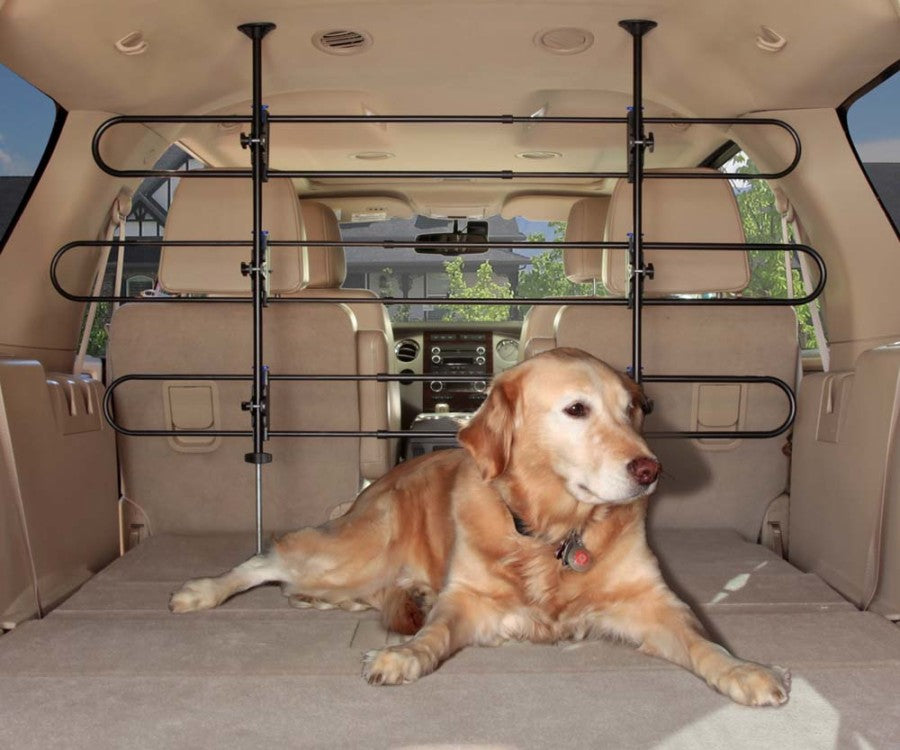
The QuickCONNECT Tubular Car Barrier improves safety by reducing distractions when you travel with your dog. Special features eliminate the annoying rattling sound that comes with other designs, so you can enjoy a truly peaceful trip. Many barriers have a hard time staying in place, but the Tubular Car Barrier design includes rubberized top and bottom caps to firmly grip the floor and headliner and prevent slipping. Plus, caps don't fall off when the barrier is dis-assembled. Quick-connect clamps allow easy removal of the horizontal tube sections for quick access to the pet or cargo area. This feature also allows you to un-install or re-install the barrier in under one minute. When it's not in use, the barrier stores safely in its own stuff sack.
Dimension
Dimension
- Product Gross Weight: 9.5000 lb
- Product Net Weight: 9.5000 lb
- Product Height: 2.50 in
- Product Length: 33.50 in
- Product Width: 5.50 in
Instruction
Instruction
- Assembly Required?: Yes
- Assembly Instructions: 1.Remove the threaded rod and short, black plastic spacer from inside each of the two straight tubes. Discard the two plastic spacers.2. Push an oval cap firmly onto one end of each straight tube. Slip three mounting brackets onto one straight tube with the hexagonal holes all facing the same side. Slip three mounting brackets onto the other straight tube with the hexagonal holes all facing the opposite side, so the two tubes mirror each other.3. Insert a short bolt through each mounting bracket, fitting the bolt head into the hexagonal hole. Screw a small wingnut onto each bolt. Leave these loose for now; you’ll adjust them soon.4. Screw a large wingnut onto the uncapped end of each threaded rod. Twist a round cap tightly onto the same end of each threaded rod.5. Insert a long bolt through each of the clamp halves with blue buttons, fitting the bolt head into the hexagonal hole. Position two of these clamp halves with the blue buttons facing the same direction, then set an extendable oval tube across them. Make sure one clamp half is on the extendable (thinner) section of the oval tube. Repeat these steps with the remaining oval tubes and clamps.6. Set the other half of each clamp over the bolt and secure it with a small wingnut. Leave these loose for now; you’ll adjust them soon. Repeat these steps with the remaining oval tubes and clamps.7. Insert a threaded rod into each hollow tube to form a pair of upright supports. Stand them up with the round bottom caps on the floor, spaced evenly across the width of your vehicle. Rotate each large wingnut to adjust the height until each oval top cap is pressed firmly into the ceiling. Both upright supports should now stand securely on their own. Adjust the mounting brackets so the flat rectangular slots all face you; these are where you will mount the oval tube clamps.8. Mount each oval tube onto the upright supports. To snap each pair of clamps into place, press and hold the blue buttons, slide the clamps down onto the rectangular slots on the mounting brackets and release the blue buttons.9. Now you’re ready to adjust your barrier for a perfect fit! You can slide each oval tube up or down to fit your vehicle. Loosen the wingnuts on the mounting brackets to slide each oval tube up or down on the upright supports. When each oval tube is at the height you want, tighten the wingnuts on the mounting brackets.10. You can extend each tube to the left, to the right, or to both sides to fit your vehicle. Loosen the wingnuts on the clamps to extend or shorten each oval tube. When each oval tube is the width you want, tighten the wingnuts on the clamps.11.You can use the included stickers to color-code the pieces to make setup quick and easy each time. Match each pair of oval tube clamps with the corresponding pair of mounting brackets.12. To store your barrier, simply press the blue buttons on each pair of clamps to remove the oval tubes from the upright supports. Twist the large wingnut on each support to release the tension holding the support in place. Remove the threaded rod from each hollow tube. Store these pieces in the included storage pouch until you’re ready to use your barrier again.
- Storage Instructions: Simple to Store - When you are not using the barrier, it quickly disassembles so you can store it in the included storage pouch until your next adventure with your pup