PREVUE PET PRODUCTS INC
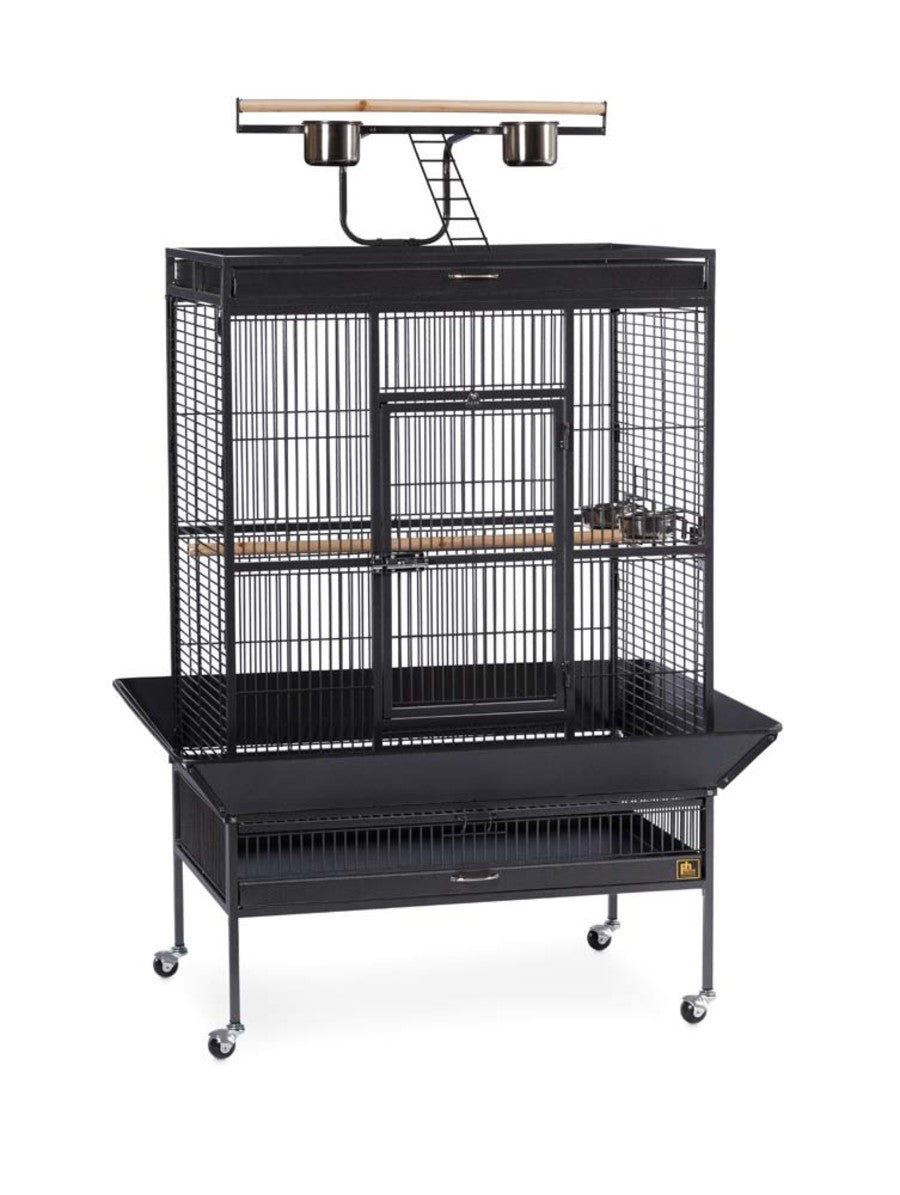
Prevue Pet Products 3154 Select Series Wrought Iron Bird Cage
SKU: PT0160031541Hammertone Black, 1ea
Regular price
$774.47 USD
Regular price
$619.17 USD
Sale price
$774.47 USD
Unit price
per
Couldn't load pickup availability
Prevue Pet Products Wrought Iron Select Cage in Black offers quality craftsmanship at an affordable cost. Constructed of wrought iron with a cagetop playstand to keep your bird entertained and content a heavy-duty push button lock keeps your bird securely inside the cage when playtime is over. This select bird cage also includes four stainless steel cups two wood perches and a castered stand for portability. Both drawers and bottom grille are removable for ease of cleaning while the rounded corner seed guards control mess around the cage. Our Wrought Iron Select Cage in Black measures 36x24x66 with 3/4in wire spacing.
Dimension
Dimension
- Product Gross Weight: 107.0000 lb
- Product Net Weight: 107.0000 lb
- Product Height: 11.00 in
- Product Length: 36.50 in
- Product Width: 37.00 in
Instruction
Instruction
- Assembly Instructions: 1a. Assemble the base: Insert the tabs on side lower (L1 & R1) panels into the sleeves on the legs of front lower (F1) & back lower (B1) frame panels (see detail). The tray/grille channels on the side panels should face the inside of the cage.1b. Insert the front upper (F2) panel over the corner posts of the front lower frame. Secure the front panel with a long hex screw in each lower corner. The hex screw will pass through the hole in the front upper panel frame leg, through the hole in the front lower panel corner post, and to the threaded receiving hole in the opening of the side lower panel. Follow the same procedure for the back. Insert the back upper (B2) panel over the corner posts of the back lower frame, align the side frames and secure the corners with the long hex screws.2. Assemble the sides: Slide the right side upper (R2) panel down through the channel guides along the inner front & back panel frame legs. The third channel guide down is hooked for an extra level of stability (see detail). Three heavy vertical wires on the side panel extend below lowest horizontal wire. Align the extended wires with the corresponding holes along top surface of the side lower panel. Repeat for the left side upper (L2) panel.3a. If you have someone helping you, have them assemble the playtop tray (T2) and bottom tray (T1) handles. Put a washer on the small slot head screw, poke the washer/screw com both rough the hole from tray inside, align it with the handle, and tighten snuggly.3b. With the playtop tray (T2) removed, insert the playtop rack (PT1) frame onto the cage, aligning the corner posts of the playtop with the open ends of the front & back panel frames. The extended vertical wires at the top of both side panels will align with corresponding holes on the underside of the playtop rack. Once all wires have been aligned and playtop has been nestled into place, secure the playtop with short hex screws in each corner.4. If you have help, lower the cage to the floor and insert the rolling casters. If you do not have assistance, and are lowering the cage by yourself be very careful, as it is a heavy cage. Cushion the floor with heavy couch pillows to add an extra level of protection. After inserting casters, return cage to upright position.5a. Insert the playtop tray (T2) into place at the top. Insert cup holders into the cup doors, and insert the deep coop cups into the holders (see detail). Insert the long perch into the inside of the cage. Insert the grille (G) and bottom tray (T1) into place at the base.5b. To keep the grille securely in place, a safe-clip is included. Locate the short horizontal bar on the front panel under the grille, and centered directly under the grille handle. Hook the open-ends of the safe-clip onto the short horizontal bar. Hook the upper part of the safe-clip over the handle on the grille (see detail).6. Assemble the Playtop unit:(1) U-bar ships as two pieces. Pre-assemble. U-bar before attaching to back edge of playtop frame with two long hex screws.(2) Attach cup/perch bar to U-bar with two long hex screws(3) Insert cup holders and short coop cups into holders on cup/perch bar(4) Slide shortest perch onto cup/perch bar(5) Install Ladder. Fit the ladderâs top posts into holes on face of cup/perch bar; the bottom posts into holes on front top edge of playtop frame.7. Assemble the seed guards: Left & right side seed guards (S63 & S64) are interchangeable & have tabs at the corners which fit into sleeves on the frame legs of the front/back (F1 & B1) panels. To make assembly easier. pre-assemble (upside down) the SG4/SG2 pair and the SG1/SG3 pair on the floorSlip the side/back (SG4/SG2) seed guard pair into place (see detail). Slip the front/side (SG1/SG3) pair into place. Align the holes at the front (SG1 + SG4) comer and secure guards together with screw & nut pairs. Finish with the back (SG3 + SG2) corner.
Safety
Safety
- Safety Warnings: Inspect the product periodically and remove from use if it becomes worn or damaged
Specifications
Specifications
- Bird Cage Access Doors: 3 Count
- Cage Height with Playtop Open: 67 Inches


