

PREVUE PET PRODUCTS INC
Prevue Pet Products Flight Bird Cage
SKU: PT0160000050Black Hammertone Finish, 1ea/LG
Couldn't load pickup availability
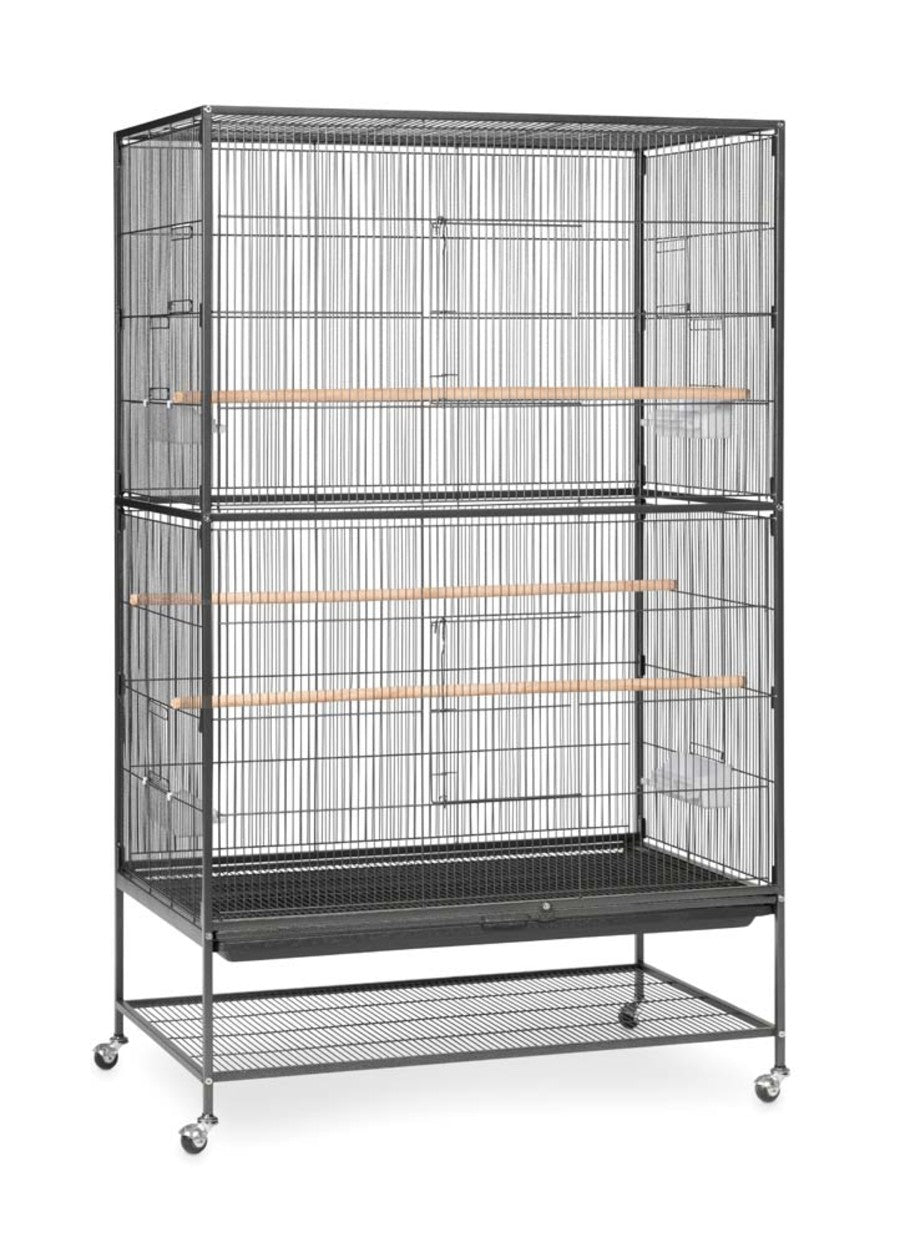
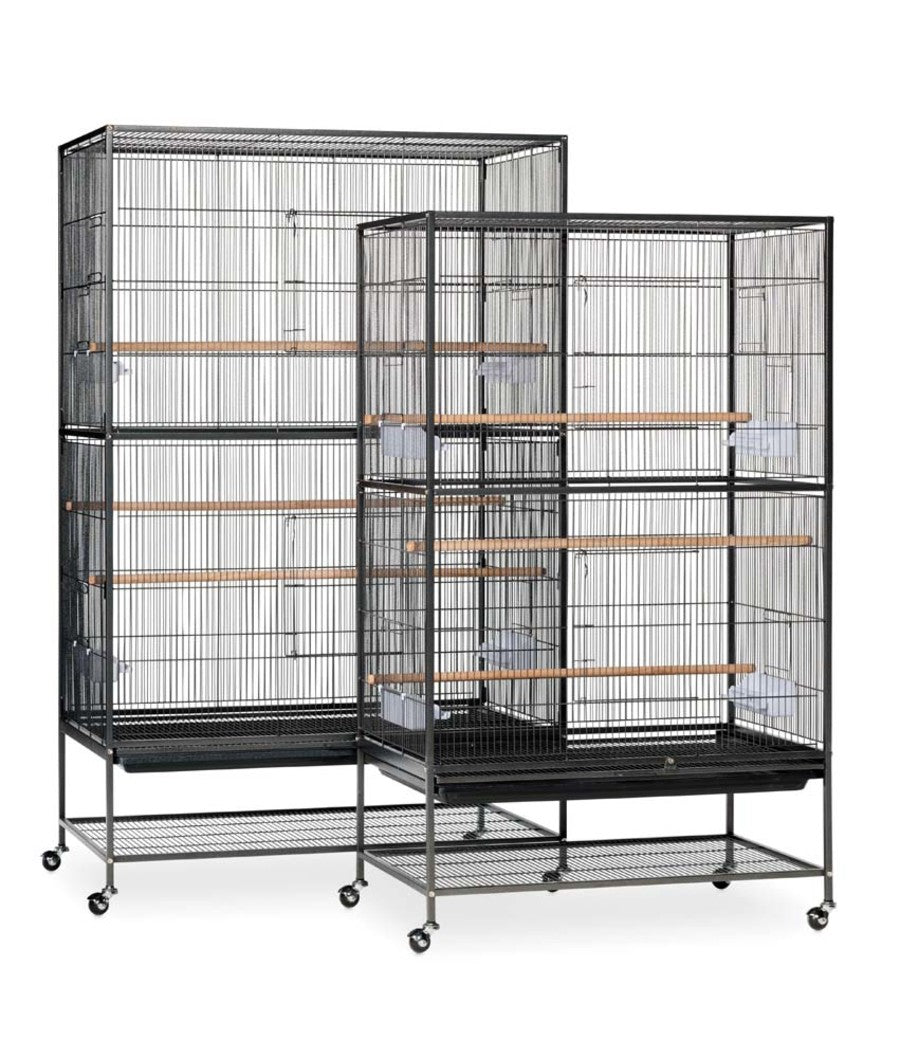
Prevue Pet Products Extra Large Wrought Iron Flight bird cage Black Hammertone F050 A larger version of our best-selling F040 Flight bird cage! A perfect home for parakeets, canaries or finches, allow your bird room to roam in this spacious flight bird cage. Featuring two large front doors for easy access plus a pull out bottom grille and tray for convenient cleaning. With a bottom shelf to provide additional storage space, this flight bird cage stands on rolling casters and is easily moved from room to room. Four plastic cups and three solid wood perches are included in this economical extra large flight bird cage. Our Extra Large Wrought Iron Flight bird cage F050 is easy to assemble, available exclusively in an elegant Black Hammertone finish and measures 37 inches Long, 23 inches Wide and 60 inches with 1/2 inch wire spacing.
Dimension
Dimension
- Product Gross Weight: 49.0000 lb
- Product Net Weight: 49.0000 lb
- Product Height: 6.00 in
- Product Length: 39.00 in
- Product Width: 37.00 in
Instruction
Instruction
- Assembly Instructions: 1a. Assemble the base: Lay the back lower (B1) and the front lower (F1) frames on their sides. Install the bottom storage shelf (C1) panel with four hex screws. Tighten securely to create a stable base.1b. While the cage is on its side. Insert a rolling caster wheel in each leg post.2a. Assemble the Lower half: Stand the cage upright. The side rails have small holes along the top surface of the frame which align with extended vertical wires on the side lower(L2)& (R2) panels. The side rails also have track channels along the inside surface for the grille & tray The holes should be facing up and the tracks should be facing the cage interior. Attach the Left Lower (L1) and right Lower (R1) side rails with hex screws, through the leg frames, into each end.2b. The side lower (L2) & (R2) mesh panels have one spring-loaded door ¡n each panel. They also both have vertical wires extending above and below the panel.Slide the right side Lower (R2) panel down through the channels along the inside rails of the front and back panel frame (see detail [a]). Align the extended wires at the bottom with the holes on the top surface of the lower rail (R1) (see detail [b]). Install the left side lower (L2) panel in the same manner. When installed correctly, doors will open out.3a. Assemble the upper half: The front upper (F2) and back upper (B2) panels have posts on the lower frame legs which align with holes in the frame of the front tower and back lower panels (see detail [c]). The upper panels also have extended vertical wires in the mesh portion which correspond with holes along the top surface of the lower frame. Stack the front upper (F2) panel onto the front lower (F1) frame. Align the upper frame corner posts into the lower frame corner holes. Align the upper frame extended vertical wires with the lower frame holes. Stack the back upper (B2) panel onto the back lower (B1) panel in the same manner.3b. The middle (L3) & (R3) side rails have small holes along the top and bottom surfaces of the frame which align with extended vertical wires on the side lower (L2) & (R2) and side upper (L4) & (R4) panels Attach the left middle (L3) side rail by aligning the holes along the bottom surface with the extended wires along the top edge of (L2), and securing the rail with hex screws, through the leg frames, into each end. Install the right middle (R3) side rail in the same manner.3c. The side upper (L1) & (R4) mesh panels have two spring-loaded doors ¡n each panel. They also both have vertical wires extending above and below the panel. Slide the right side upper (R4) panel down through the channels along the inside rails of the front and back panel frame (in the same manner as Step 2b).Align the extended wires at the bottom with the holes on the top surface of the middle side rail (R3). Install the left side upper (L4) panel in the same manner. When installed correctly, doors will open out.4. Assemble the roof: Side rails on the roof (C2) panel have small holes along the bottom surface which align with extended vertical wires on the side upper (L4) & (R4) panels. There are also extended wires along the front and back edge of (C2) which align with holes along the inside surface of the front and back (F2) & (B2) frames. Align the top (C2) panel by aligning holes and extended wires. Secure the roof with hex screws in each corner.5. With the cage completely assembled, rotate the windbell lock to one side and slide the grille (G) and tray (T) into position; grille in the upper track, tray in the tower track6. When the cage is completely assembled, insert the food/water cups into the side doors (see detail [d]) and install the perches (see detail [e])
Safety
Safety
- Safety Warnings: Inspect the product periodically and remove from use if it becomes worn or damaged
Specifications
Specifications
- Bird Cage Access Doors: 8 Count