LIFETIME PRODUCTS LLC
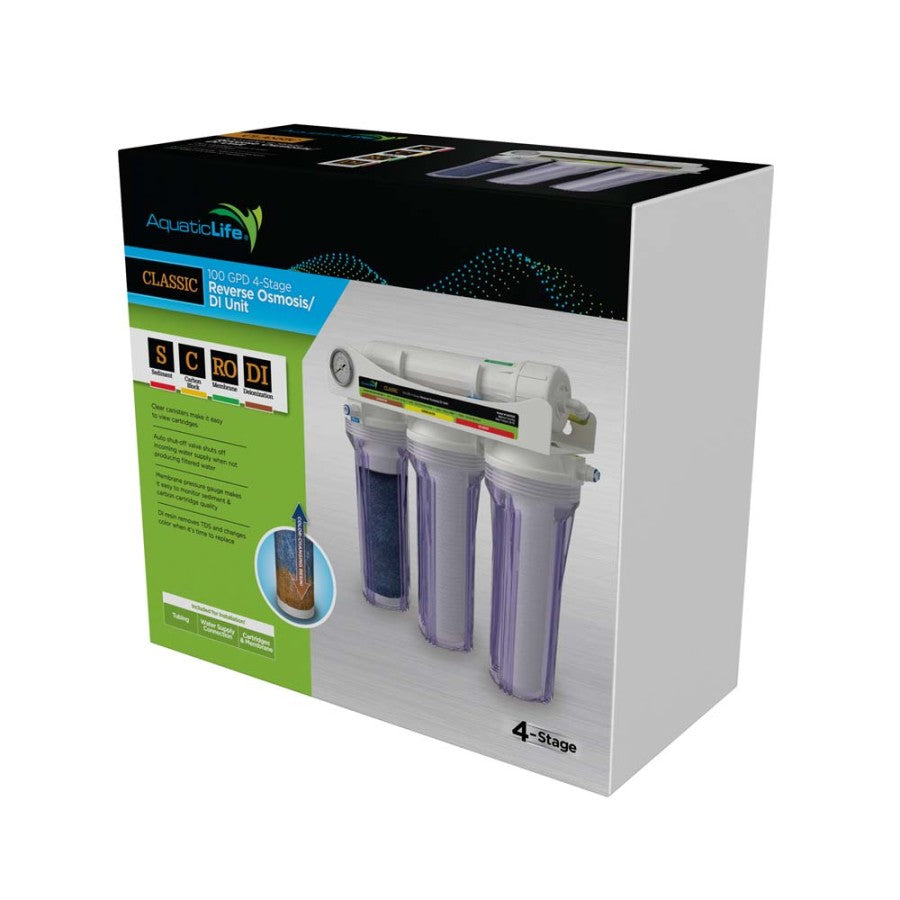
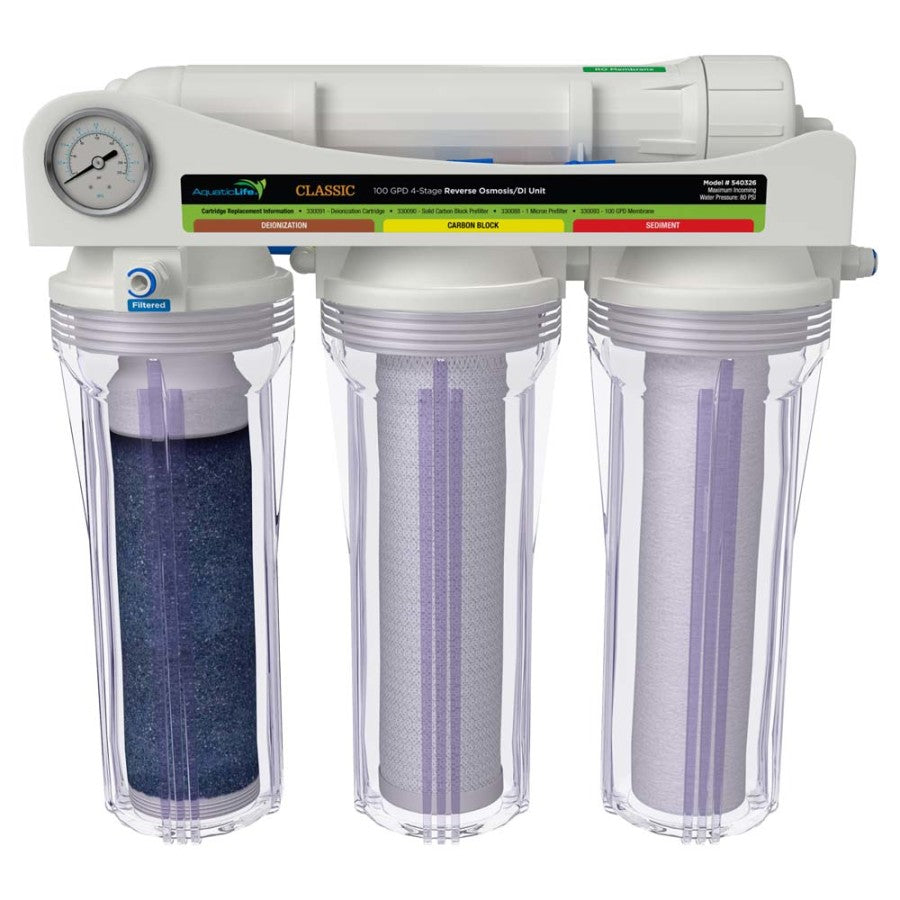
Aquatic Life Classic 4-Stage Reverse Osmosis/Deionization System
SKU: PT01458013261ea
Regular price
$191.05 USD
Regular price
$152.44 USD
Sale price
$191.05 USD
Unit price
per
Couldn't load pickup availability
The RO Junior 100 GPD four-stage Reverse Osmosis unit provides filtered water using industry-standard 10 inch replacement cartridges. Includes sediment and carbon cartridges , RO membrane, GAC cartridge, tubing and garden hose thread faucet adapter.
Dimension
Dimension
- Product Gross Weight: 14.0000 lb
- Product Net Weight: 14.0000 lb
- Product Height: 8.00 in
- Product Length: 19.00 in
- Product Width: 19.00 in
Instruction
Instruction
- Assembly Instructions: Installation:Stage 1 – Sediment Filter: Recommended change 3-6 months or 3,500 gallons total or 900 gallons of filtered water. The first stage of your RO unit is a five micron sediment filter that traps sediment and other particulate matter like dirt, silt and rust which will affect the taste and appearance of your water.Stage 2 – Carbon Block Filter: Recommended change 3-6 months or 3,500 gallons total or 900 gallons of filtered water (at 1 ppm chlorine). The second stage of your RO unit is a carbon block filter. The activated carbon in the filter reduces chlorine and conditions the water prior to the RO membrane.Stage 3 – Ro Membrane: Recommended change 12-24 months The RO membrane reduces impurities known as total dissolved solids (TDS) from the water down to 1/10,000 of a micron, reducing arsenic, lead, parasitic cysts, copper and more. Because the process of filtering the high-quality water takes time, it is common to use a storage tank to collect filtered water, making it available on demandStage 4 – Color Changing Resin (Deionization):Replace filter when resin changes color.After the water is filtered by the membrane, there is usually a small amount of total dissolved solids (TDS) left in the water. In certain non-drinking water applications, it is important to remove the remaining TDS from the water. This is accomplished by filtering the water through a resin that is charged with cation and anion resins (H+ and OH-). As the resin absorbs the TDS, it will change color. When all resin has changed color, it is time to replace the DI filter.Operating Guidelines:1. Do not use with water that is microbiologically unsafe or of unknown quality without adequate disinfection before or after the unit.2. The maximum incoming water pressure for the unit is 80 PSI. If the pressure is more than 80 PSI, a pressure regulator is required. If the water pressure is less than 40 PSI, a booster pump is needed.3. Water hardness should not exceed 10 grains per gallon or 170 parts per million. Operating above this may shorten the membrane life.4. Reverse osmosis filtered water should not be run through a copper tube. The pure RO water can leach copper from the pipe, eventually leading to holes in the pipe.5. Do not operate the unit unattended.Note: Filter cartridges and membrane life may vary based on local water conditions and amount of use.Water Supply Installation: This Aquatic Life RO unit includes two options for easy connection to a water supply.Option 1: Connect to a standard water faucet (often found on the exterior of houses, utility sinks, and washing machines) with the hose bib connectionOption 2: Your RO unit includes a special adapter that will connect to most kitchen and bathroom faucets. To install:1. Remove the existing aerator on the sink faucet.2. Thread-in the two-piece sink faucet adapter.3. Attach the hose bib connection to the other end of the sink faucet adapter.Mounting the Reverse Osmosis Unit: The Aquatic Life Classic RO unit is designed to be mounted to a secure surface. This will allow for the cartridges to easily be replaced as needed. A metal bracket with screw holes is provided.Use screws designed for the type of surface that the RO unit will hang on. Leave the screws extending about 1/8 from the surface and then hang the metal bracket on the screws.Note: If your model includes rubber plugs on any of the ports, it is now OK to remove the plug by simply pulling it out.Using the Buddie Fit Press Fittings:1. Remove the blue clip from the press fitting.2. Cut tubing evenly and not at an angle.3. Pull back on the tubing to ensure it is secure. Insert the locking blue clip back onto the press fitting. Push the tubing into the fitting. You will hit the first stop. The tubing is still not secured properly. Push the tubing a second time and you will feel the tubing insert completely (5/8) into the press fitting.4. Pull back on the tubing to ensure it is secure.5. Insert the locking blue clip back onto the press fitting.Note: To remove a piece of tubing, remove the blue clip and press down on the collet where the tubing enters the fitting. While the collet is depressed, remove the tubing from the fitting.Note: We recommend cutting the tubing with a razor blade or something similar, so the tubing is not pinched. If the tubing is pinched, it will not seal properly. All tubing connections will have a “double push” into the connectors. You should feel a two-step insert to verify the tubing is inserted completely into the connectors.Install the Color-Coded Tubing: The Aquatic Life Classic units include color coded tubing to help identify filtered, incoming and waste water. This also makes it easier to correctly connect the tubing to the unit. Refer to the Buddie Fit press fittings instructions (left) before installing the tubing.Step 1 – Connect one end of the yellow tubing to the hose adapter on the incoming water supply and the other to the supply port.Step 2 – Cut the yellow tubing and install the ¼ manual on/off valve in a convenient place in the water supply line.Step 3 – Connect one end of the red tubing to the waste port. Secure the other end to a drain or collection container.Step 4 – Connect one end of the blue tubing to the filtered water port. The other end should be plumbed to a container that will collect your reverse osmosis water.Note: A 90° elbow is included that can be used in plumbing the Classic RO unit. If desired, insert the elbow between one of the ports and the tubing.Installing the cartridges:Step 1 – Use the canister wrench to loosen the canisters and gain access to the cartridges. Remove the plastic wrap from the cartridges and reinsert into the canisters before tightening. The sediment cartridge must be on the right and the carbon cartridge in the middle for proper operation.NOTE: Center the cartridges in the middle of each canister prior to re-attaching. The carbon cartridge has a gasket on each end that must be properly seated.Step 2 – Reattach the canisters.Important: Flush carbon cartridge prior to installing the ro membrane & di resin cartridge.The carbon cartridge may contain carbon dust that must be flushed out prior to installing the membrane. If it is not rinsed, carbon dust can plug the membrane and shorten its life.Step 3 – Flush the carbon cartridge. With only the sediment and carbon cartridges installed, allow water to run through the RO unit for several minutes. Make sure the DI resin cartridge is not installed yet.Step 4 – Install the membrane. Remove the yellow tubing connected to the membrane cap and use the membrane wrench to remove the cap.Step 5 – Remove the protective wrap from the RO membrane and insert into the membrane housing.Step 6 – Install the membrane cap and tighten with the membrane wrench. Re-attach the yellow tubing to the elbow on the membrane cap.Preparing Membrane for Use:Important: Flush the RO membrane before use of the RO unit.All RO membranes contain a preservative to keep them sterile. It is important to flush the preservative out of the membrane prior to using the filtered water. Turn on the water to the ro unit and allow running for 30 minutes. Discard all the water from the first 30 minutes of operation.Step 7 – Install the color-changing deionization cartridge in the remaining clear canister – this is the far-left canister. Ensure that the gaskets are in place and the cartridge is centered in the housing prior to closing and securing with the canister wrench. The unit is now ready for use.Note: The Classic 100 GPD, 4-Stage RO/DI Unit includes an auto shut-off valve and check valve pre-installed on the unit. This valve is helpful when using the RO/DI Unit with a float valve or pressure tank. The valve will shut-off the incoming water line when the filtered water line is shut-off.Reverse Osmosis Filter - Operation & Considerations: The unit includes a pressure gauge to show the incoming water pressure. Your target pressure is 60- 65 PSI. You will produce less filtered water if your water pressure is below 60 PSI. Pressure above 60 PSI may produce more water. If the incoming water pressure is less than 40 PSI, you may need to add a booster pump.1. Operating the Classic RO/DI unit using softened feed water greatly reduces the chances of membrane failure.2. Clear canisters have a limited life and should be replaced on an annual basis to prevent possible failure.3. Operating pressure less than 40 PSI may require a booster pump.4. Operating pressure greater than 80 PSI requires a pressure regulator.5. With initial operation, check for leaks. If a leak is observed, verify that the tubing is pushed into the push-fitting far enough to seal the tubing against the o-ring and that the canisters and caps are sealed properly with their o-rings.6. Many of the components in the Classic RO/DI unit are plastic and subject to damage by ultraviolet light.7. Never store or operate the unit in direct sunlight or other bright lights.8. Do not store or operate the unit in temperatures above 100°F.9. Do not store or operate the unit in freezing temperatures.10. Do not leave the unit unattended while connected to a water supply.
Safety
Safety
- Safety Warnings: This unit will remove chlorine, but not chloramines. Test your water and/or check with your local water company to find out if you have chloramines in your water. Please read carefully before proceeding with installation. Your failure to follow any attached instructions and operating parameters may lead to the product’s failure. Do not drink water that has been filtered with a DI resin cartridge.
Specifications
Specifications
- Filter Types: Carbon
- Total Water Volume: 3500 Gallons
- Minimum Water Temperature: 39 Degrees Fahrenheit
- Maximum Water Temperature: 100 Degrees Fahrenheit
- Optimal Water Temperature: 77 Degrees Fahrenheit
- Maximum Water Pressure: 80 PSI
- Minimum Water Pressure: 30 PSI
- Optimal Water Pressure: 65 PSI


