AQUATOP
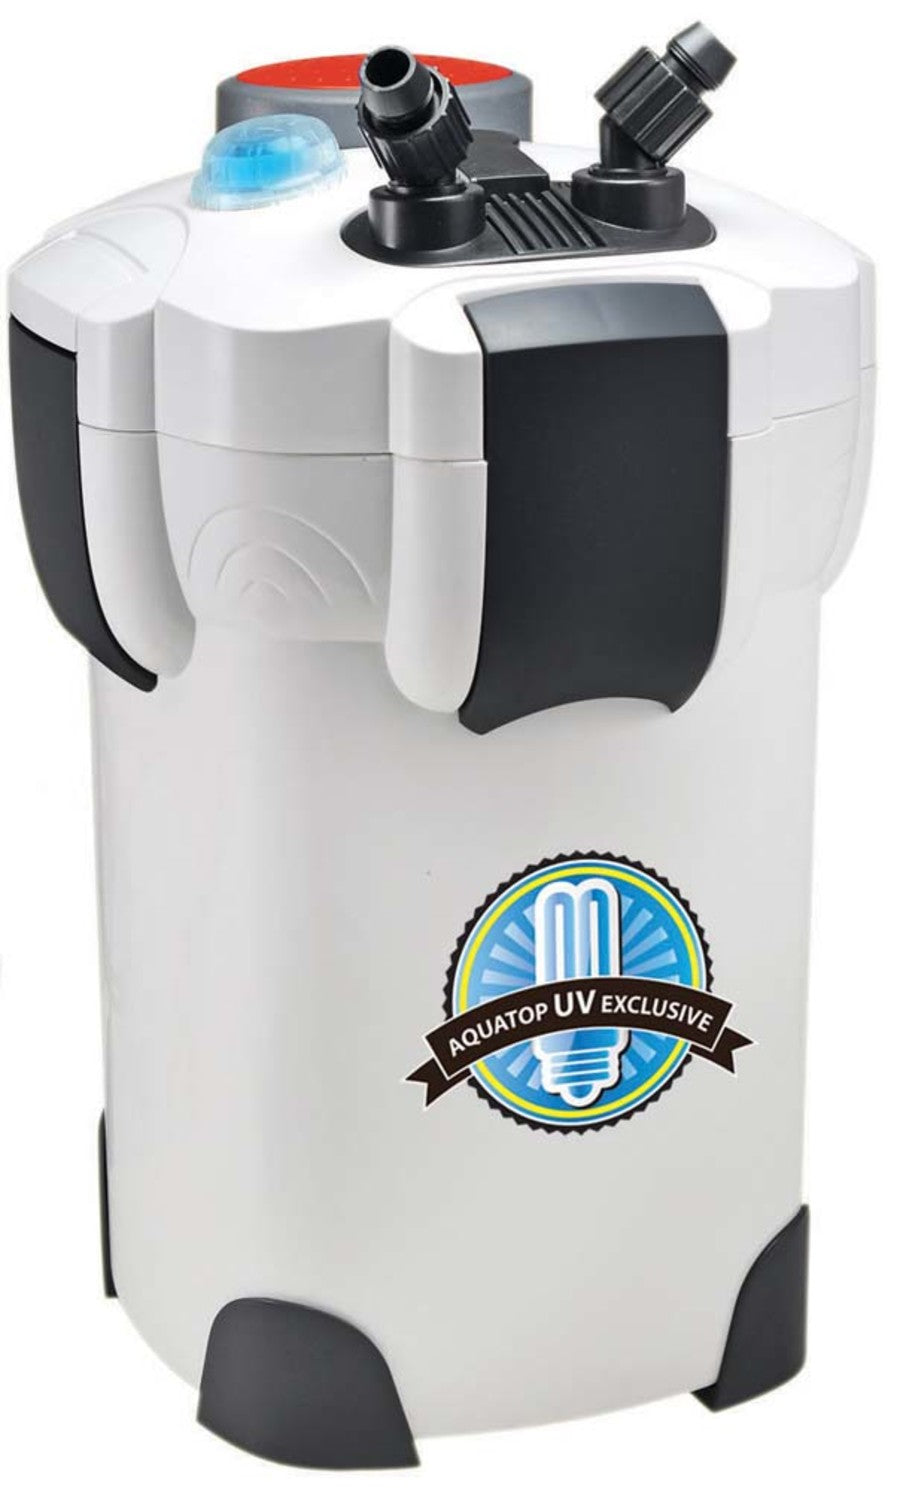
Aquatop CF500UV Canister Filter with UV Sterilization
SKU: PT0139001802Grey, 1ea
Regular price
$232.72 USD
Regular price
$226.55 USD
Sale price
$232.72 USD
Unit price
per
Couldn't load pickup availability
The CF500-UV takes UV canister filters to the highest level. This 525 GPH 4+1 filtration system is ideal for fresh and saltwater aquariums up to 175 gallons. The integrated 9 watt UV Sterilizer helps keep your aquarium healthy and crystal clear. The CF500-UV defies its low price because it comes equipped not only with a UV Sterilizer but all the necessary plumbing for installation and includes four large filtration media compartments allowing you to add the filtration media of your choice. The filtration media trays offer a fully customizable filtration system to suit your specific aquatic needs.
Dimension
Dimension
- Product Gross Weight: 17.0000 lb
- Product Net Weight: 17.0000 lb
- Product Height: 11.25 in
- Product Length: 11.25 in
- Product Width: 18.00 in
Instruction
Instruction
- Assembly Instructions: 1) Remove CF Canister filter from the aquatop box and set the extras aside. Face the canister unit toward yourself with the power cord running out the back 2) To remove the barrelhead you must first unhinge the clips that are in front and back of the unit. These two clips are attached to the bottom of the unit. Next unhinge the clips that are left to right. These two clips are attached to the barrelhead. Remove the barrelhead by pulling it up vertically. (be careful of the U.V. sterilizing bulb when removing or securing the barrelhead on the CF-400 UV & CF-S00 UV)3) Remove all filter compartments. Note how the filter compartments are stacked to support the U.V sterilizing bulb. The vertical cylinder cut-outs of the filter compartments are to be stacked one on top of another and act as a sheath for the U.V sterilizing bulb. 4) Rinse all filtration compartments and all filtration media (sold separately): cotton filter(s), sponge filter, and 810-balls. Important: rinse the carbon filter(s) until the run-off water is clear. The carbon may take a few minutes to rinse clear. 5) Rinse out the bottom portion of the CF unit.6) Stack the filtration compartments from the bottom up. The bottom/first compartment should receive the sponge filter on the bottom with a cotton filter on tor the middle/second compartment should receive a cotton filter on the bottom with the carbon filter(s) on tor the top/third compartment should receive a cotton filter on the bottom with bio balls or aquatop's ceramic rings on tor the top/third compartment receives the filter compartment cover. 7) The barrelhead goes back on top (be careful of the U.V. sterilizing bulb). The clips attached to the barrelhead must be hinged into place first. (give a light downward push on the barrelhead to engage the bottom half of the unit.) next, the clips attached to the bottom portion on the unit must be hinged into place. 8) To secure the input and output valve, you must pull up on the lever located between the input and output nozzles. next insert the valve into designated area on top of the barrelhead. Push into place firmly and push lever down. the input and output valve is now open and secured to the canister filter.9) How to secure intake and return tubing to the CF canister filter: first slip the tubing over the nozzles located on top of the input and output valve. Slip the tubing on until it can go down no further. Next turn the fasteners, located at the base of the nozzles, until they have covered the tubing. the two fasteners secure the tubing by crimping them down onto the nozzles for a watertight effect. Finally give a slight tug on the tubing to see if they are attached well. 10) Next assemble the intake and return lines and hang on the aquarium walls where desired. Secure the two items with the suction cups and clips provided. (these items are disassembled in the white box that comes with the CF canister filter.11) Place CF canister filter (with attached/secured tubing) where desired. Cut vinyl tubing to appropriate length and attach to the appropriate assembled input and output fittings. the output line running from the canister filter will attach to the horizontally mounted spray bar. The input line running from the canister filter will attach to the vertically mounted input bar that has the input cover.12) Before plugging in your CF canister filter you must fill it using the prime pump. The prime pump fills the canister filter and tubing by creating a siphon (gravity fed). The prime pump is a round button located on the top of the barrelhead. Your aquarium must be filled with water to do this. With a filled aquarium, compress and depress the prime pump to remove air from the canister filter and to draw in water into the canister filter. Once water 15 present in the filter and in the tubing, you are ready to go.13) Check for leaks. If there are none, plug in the CF canister filter. 14) Check for leaks again. If there are none, enjoy the use of your CF canister filter.
Safety
Safety
- Caution: It is your sole responsibility to verify that the plug and the receptacle are clean and free of moisture and salt buildup at all times. The receptacle must be free of water, salt, calcium, magnesium and dust. Failure to do so can cause fire, damage to property and permanent damage to the product and personal injury not limited to loss of life.1) Read and follow all instructions.2) A drip loop must be used with all electrical aquarium devices. A drip loop is a self made part of the cord hanging below the receptacle.3) A GFCI (ground fault circuit interrupter) should be used in the branch circuit supplying all power to water pumps and electrical aquarium equipment. If you do not have a GFCI, we strongly recommend having a qualified electrician install one prior to operating any aquarium component.4) Do not plug into extension cord/power strip.5) Use this product for its intended use only.6) Never yank or pull the cord from the electrical outlet.7) Do not operate if the plug or wire is damaged.8) Do not operate without water.9) Verify that hands are dry prior to disconnecting the power.10) To reduce the risks of electrocution, keep all connections dry.11) For indoor use only.12) if any of the electrical components get wet, unplug immediately.13) Do not use soaps or detergents when cleaning this device. Thoroughly clean and rinse with warm water and make sure the device is completely dry before connecting.14) Do not disassemble the UV lamp while connected to power or turned on.15) Do not look directly into the UV lamp when plugged in; UV light may damage your eye sight. Always keep cover on when UV light is in use.16) Keep this product away from children.
Specifications
Specifications
- Benefits: 1. 4-stage filtration2. Delivers crystal clear aquarium water3. Built-in UV sterilizer to help kill algae spores and bacteria
- Compatible Tank size: 175 Gallons
- Filter Types: Mechanical
- Life of the Lamp: 6-9 Months
- Maximum Lift: 8 Feet
- Recommended Water Flow: 525 GPH
- Voltage: 110 Volts
- Wattage: 55 Watts


