MILLER MANUFACTURING COMPANY
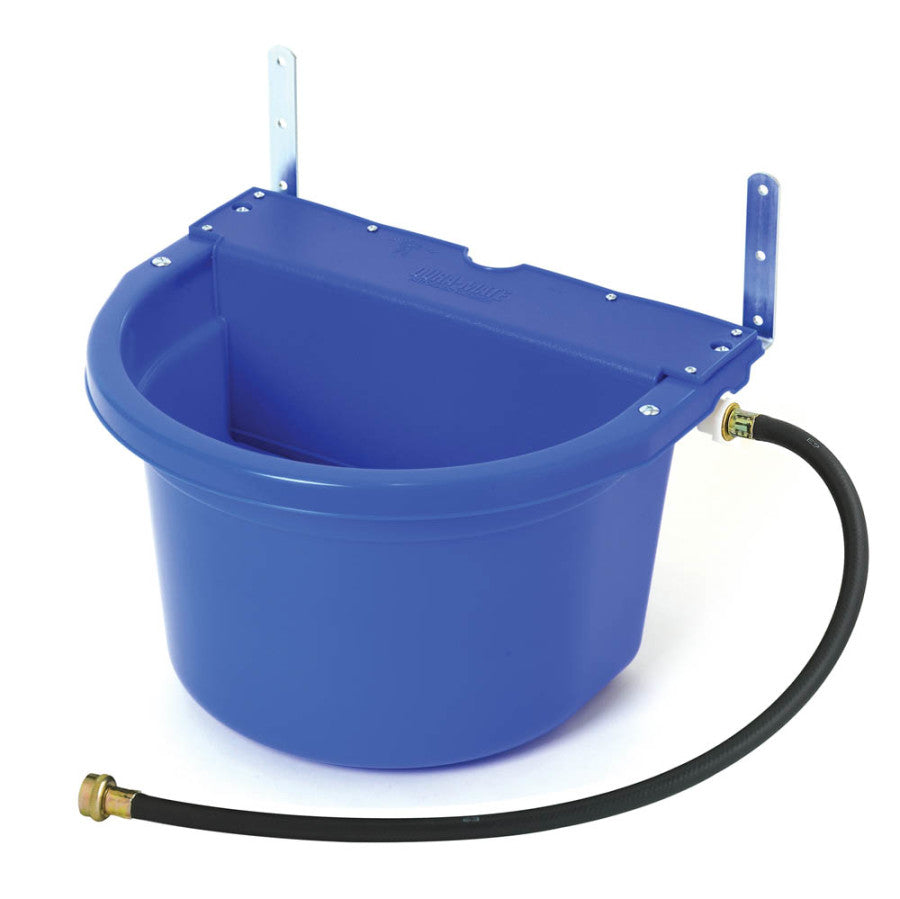
Little Giant DuraMate Automatic Waterer
SKU: PT0184200161Blue, 1ea/16 qt
Regular price
$0.50 USD
Regular price
$0.00 USD
Sale price
$0.50 USD
Unit price
per
Couldn't load pickup availability
Large capacity 16-quart waterer is perfect for horses. Includes metal brackets for over-the-fence or on-the-wall installation. Molded from impact-resistant polyethylene resin. Hooks up to 3/4 inch garden male hose. Operates between 20-50 psi. Includes 30 female hose attachment.
Dimension
Dimension
- Product Gross Weight: 5.8000 lb
- Product Net Weight: 5.8000 lb
- Product Height: 10.75 in
- Product Length: 14.50 in
- Product Width: 17.50 in
- Capacity: 16 Quart
Instruction
Instruction
- Assembly Required?: Yes
- Assembly Instructions: The waterer is shipped with the float assembly installed on the right side of the waterer base. The float assembly can be installed on either side of the waterer to best suit your application. Carefully remove the mounting nut and fiber washer from the float assembly and reinstall the float assembly on the left side of the waterer before proceeding if desired.1. Install the 7/8” plastic plug in the float assembly mounting hole not being used.2. A 1/2” rubber plug is provided if you wish to add a drain to the waterer base. Drill a 1/2” hole in the flat bottom area of the waterer base and install the plug from underneath (large flange outside the waterer) before proceeding.3. Wrap the threads of the float assembly with Teflon thread sealing tape and install the 3/4” hose adapter.4. Place the hose washer provided into the hose adapter. Push the washer in completely so it sits flat against the shoulder of the hose adapter.5. Connect the male end of the supply hose provided to the hose adapter.6. Mount the waterer in one of the following locations:Wall Mounting:a. Position short arm of mounting brackets upward.b. Install mounting brackets under lip of waterer base using bracket mounting holes shown with four (4) 1/4-20 x 1” bolts and 1/4-20 nut provided.c. Select appropriate height and attach mounting brackets to wall (fasteners not provided).d. Attach a 2” x 8” board to the wall behind the waterer as shown to act as a spacer (board and fasteners not provided).Fence Mounting:a. Position short arm of mounting brackets downward.b. Install mounting brackets under lip of waterer base using bracket mounting holes shown with four (4) 1/4-20 x 1” bolts and 1/4-20 nuts provided.Use one set of bracket mounting holes for hanging over 2” thick fence rails, and the other set of bracket mounting holes for hanging over 1” thick fence rails.c. Select appropriate height and attach mounting brackets to fence rail if desired (fasteners not provided).Corral Mounting:a. Position short arm of mounting brackets downward.b. Install mounting brackets under lip of waterer base using bracket mounting holes shown with four (4) 1/4-20 x 1” bolts and 1/4-20 nuts provided.c. Center waterer over a vertical corral post.d. Attach mounting brackets to corral rail with 1/4” x 1-3/4” U-bolts (U-bolts not provided).7. Connect the supply hose to your water supply and check to make sure the waterer fills and shuts off properly.8. The water level is preset at the factory; however, minor adjustments can be made to increase or decrease the water level in the waterer if desired. To adjust the water level, remove float arm assembly by pulling out the connecting pin, loosen the float mounting screw and nut with a screwdriver, then rotate the float arm up or down to achieve desired water level. Make sure you retighten the mounting screw and nut securely.Caution: Rotating the arm too far up or failing to secure the float mounting screw and nut may prevent the waterer from stopping the water supply flow and run continuously.
- Use Instructions: If the water flow does not stop:1. Make sure water supply pressure is between 20-50 psi.2. Make sure float arm moves up and down freely without binding.3. Make sure float is not hitting the metal float cover when closed.4. Remove float pin and float arm assembly:a. Check for water inside the float. Replace SW23 float if necessary.b. Remove any debris from valve tip or valve seal and test.c. Replace SW8 seal and test. (An additional seal is provided on the side of the float arm)d. Check SW20 valve tip for chips, surface imperfections, or cracks. Replace valve if necessary.
- Mounting Direction: Vertical
- Mounting Options: Screw-On
Safety
Safety
- Safety Warnings: Rotating the arm too far up or failing to secure the float mounting screw and nut may prevent the waterer from stopping the water supply flow and run continuously
Specifications
Specifications
- Hose Diameter: 0.75 Inches
- Hose Length: 2.5 Feet
- Maximum Operating Pressure: 50 PSI
- Automatic-refilling: Yes
- Benefits: 1. Float-controlled automatic water for livestock2. Hooks up to a standard 3/4 inch garden hose
- Minimum Operating Pressure: 20 PSI


